

How To Install Windows 8
Then you lot desire to endeavour out Windows 8. Fantabulous! But you're not foolhardy enough to try using a developer preview build as your main work/play operating system–you just want to dabble. We'll show you how to download and install the Windows 8 developer's preview onto a separate partition (or separate hard drive, if y'all take a spare). If yous don't experience like mucking your difficult drive with another partition, read How to Download and Install Windows 8 to a Virtual Machine for a less-intrusive style to get Windows 8 up and running on your PC.
If you have a spare hard drive lying around, this process is pretty easy: Download the appropriate Windows 8 ISO from the Microsoft Developer Network site, fire it to a DVD, plow off your PC, slap the difficult drive in your case, and connect it upwards to your motherboard. Then only turn your system on and either press the key that allows you to access your motherboard'south boot bill of fare or alter the boot options in the BIOS then your optical drive is recognized before your main hard bulldoze; you lot should then exist booting off your new Windows 8 disk. From there, only fire up the Windows 8 installer and install the operating organisation to your new bulldoze.
However, if you only accept one hard drive in your arrangement, you'll accept to be a little bit more than creative in gild to install Windows 8 without nuking your existing Windows installation. Welcome to the world of bulldoze segmentation: In layman'south terms, partitioning takes a hard bulldoze'due south full storage and splits it into separate chunks of data. Your operating system then treats these separate data partitions every bit dissever storage volumes.
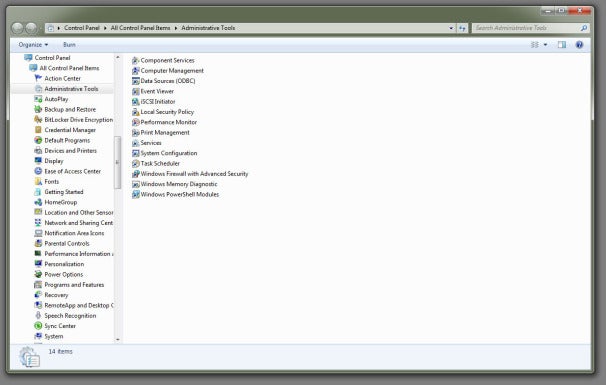
Assuming you're currently running Windows Vista or Windows 7, open Control Console and open up up the Administrative Tools screen. In that location, double-click on the Computer Management selection. When that window appears, look for the "Deejay Direction" submenu under "Storage" on the left-hand sidebar. Click that.
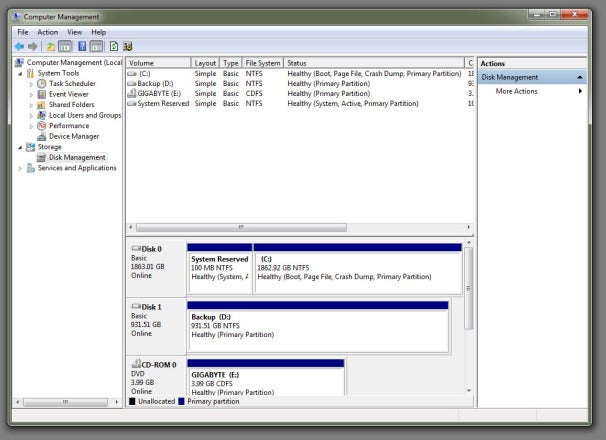
You'll meet your hard bulldoze (and optical drive) on the screen: Your primary drive should already be split into a "System Reserved" volume and your primary C: book.
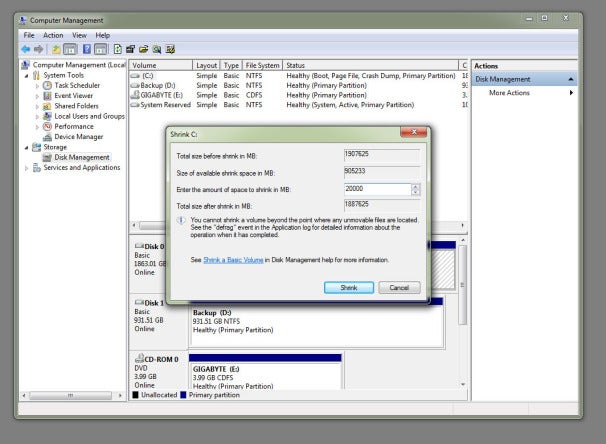
Right-click on the C: book and select the "Shrink Volume" selection, and so reduce the size of your volume past at least 16 gigabytes for a 32-chip installation of Windows 8 or 20 gigabytes for a 64-scrap installation.
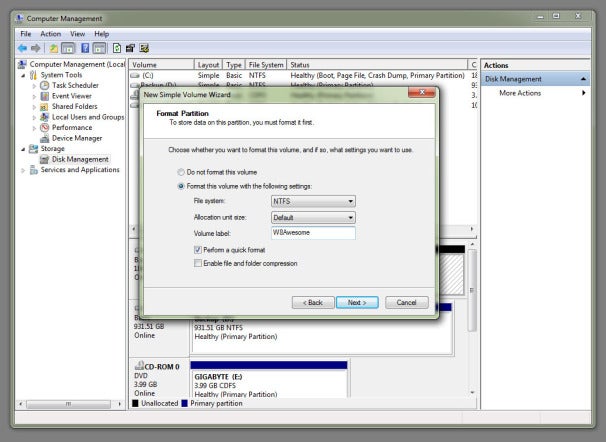
You'll now see a new, monochromatic, "unallocated" hunk of storage announced adjacent to your C: volume in the graphical brandish. Right-click on it, select the New Simple Volume option, and click on the Adjacent push until you reach the screen for assigning letters and drive paths.
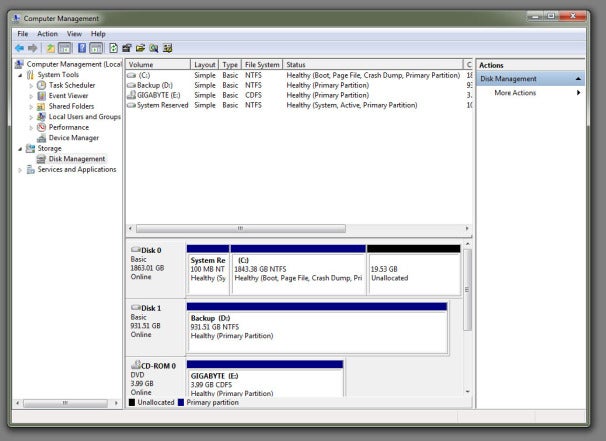
Experience free to assign your new volume whatsoever drive letter of the alphabet you most prefer. Click Next one more time and give your volume a witty name; now click Next (and and then End) to quick-format the volume every bit an NTFS partition.
Next, burn the Windows eight epitome to a disc using a freeware app like Imgburn or CDBurnerXP, then reboot your PC, admission your BIOS setup card (typically by pressing Delete or another specified key while booting upward), and change the kicking order so your PC will boot from your optical bulldoze instead of your primary hard drive when you restart your computer. Once your PC boots from the Windows 8 DVD, just install Windows 8 to your new sectionalization (identifiable by the drive letter and proper noun yous picked out).
And here's an actress tip: Once you've loaded upwardly Windows 8 for the beginning time, y'all'll be able to edit Windows' boot settings to brand Windows 7 boot by default instead of 8 (which happens later on a short fourth dimension delay if you don't select an operating system yourself).

How To Install Windows 8,
Source: https://www.pcworld.com/article/482850/how_to_download_and_install_windows_8_on_a_new_partition.html
Posted by: phillipspritioneatch.blogspot.com
0 Response to "How To Install Windows 8"
Post a Comment